Today we published the latest version of Cargo Surveyor Tools for iOS, version 1.6.2.
This update comes with a slate of improvements such as bug fixes for most of the scroll views and better keyboard handling, and new features, such as the ability to export / import bunker reports, ullage reports, time sheets and VEF reports, as well as various new settings for deciding which units need to be printed on an ullage report, and for example the option to display bunker figures before and after the cargo operation on the ullage report.
A new user manual reflecting all changes and additions has been compiled (CargoSurveyor iOS user manual version 1.6.2) which can be download from this blog on the page ‘User manuals for oil calculators and other apps’, the link can be found in the top of this page as well.
The exported reports can be imported directly into Excel and with a simple help sheet the user would be able to convert the imported data into a proper excel ullage report, bunker report or VEF report.
Ever since iOS 7, previous versions of the app had problems with scrolling in larger screens in particular when editing data in text fields. Finally most of these problems have been fixed and the user can enter data in the various text fields without the text fields disappearing from view.
In the Settings screen, two options have been added:
-
The option to calculate the VCF for each tank, or to calculate the VCF for the totals of all tanks in one grade only
-
The option to calculate the average temperature basis total cargo volume, or basis the number of tanks in use
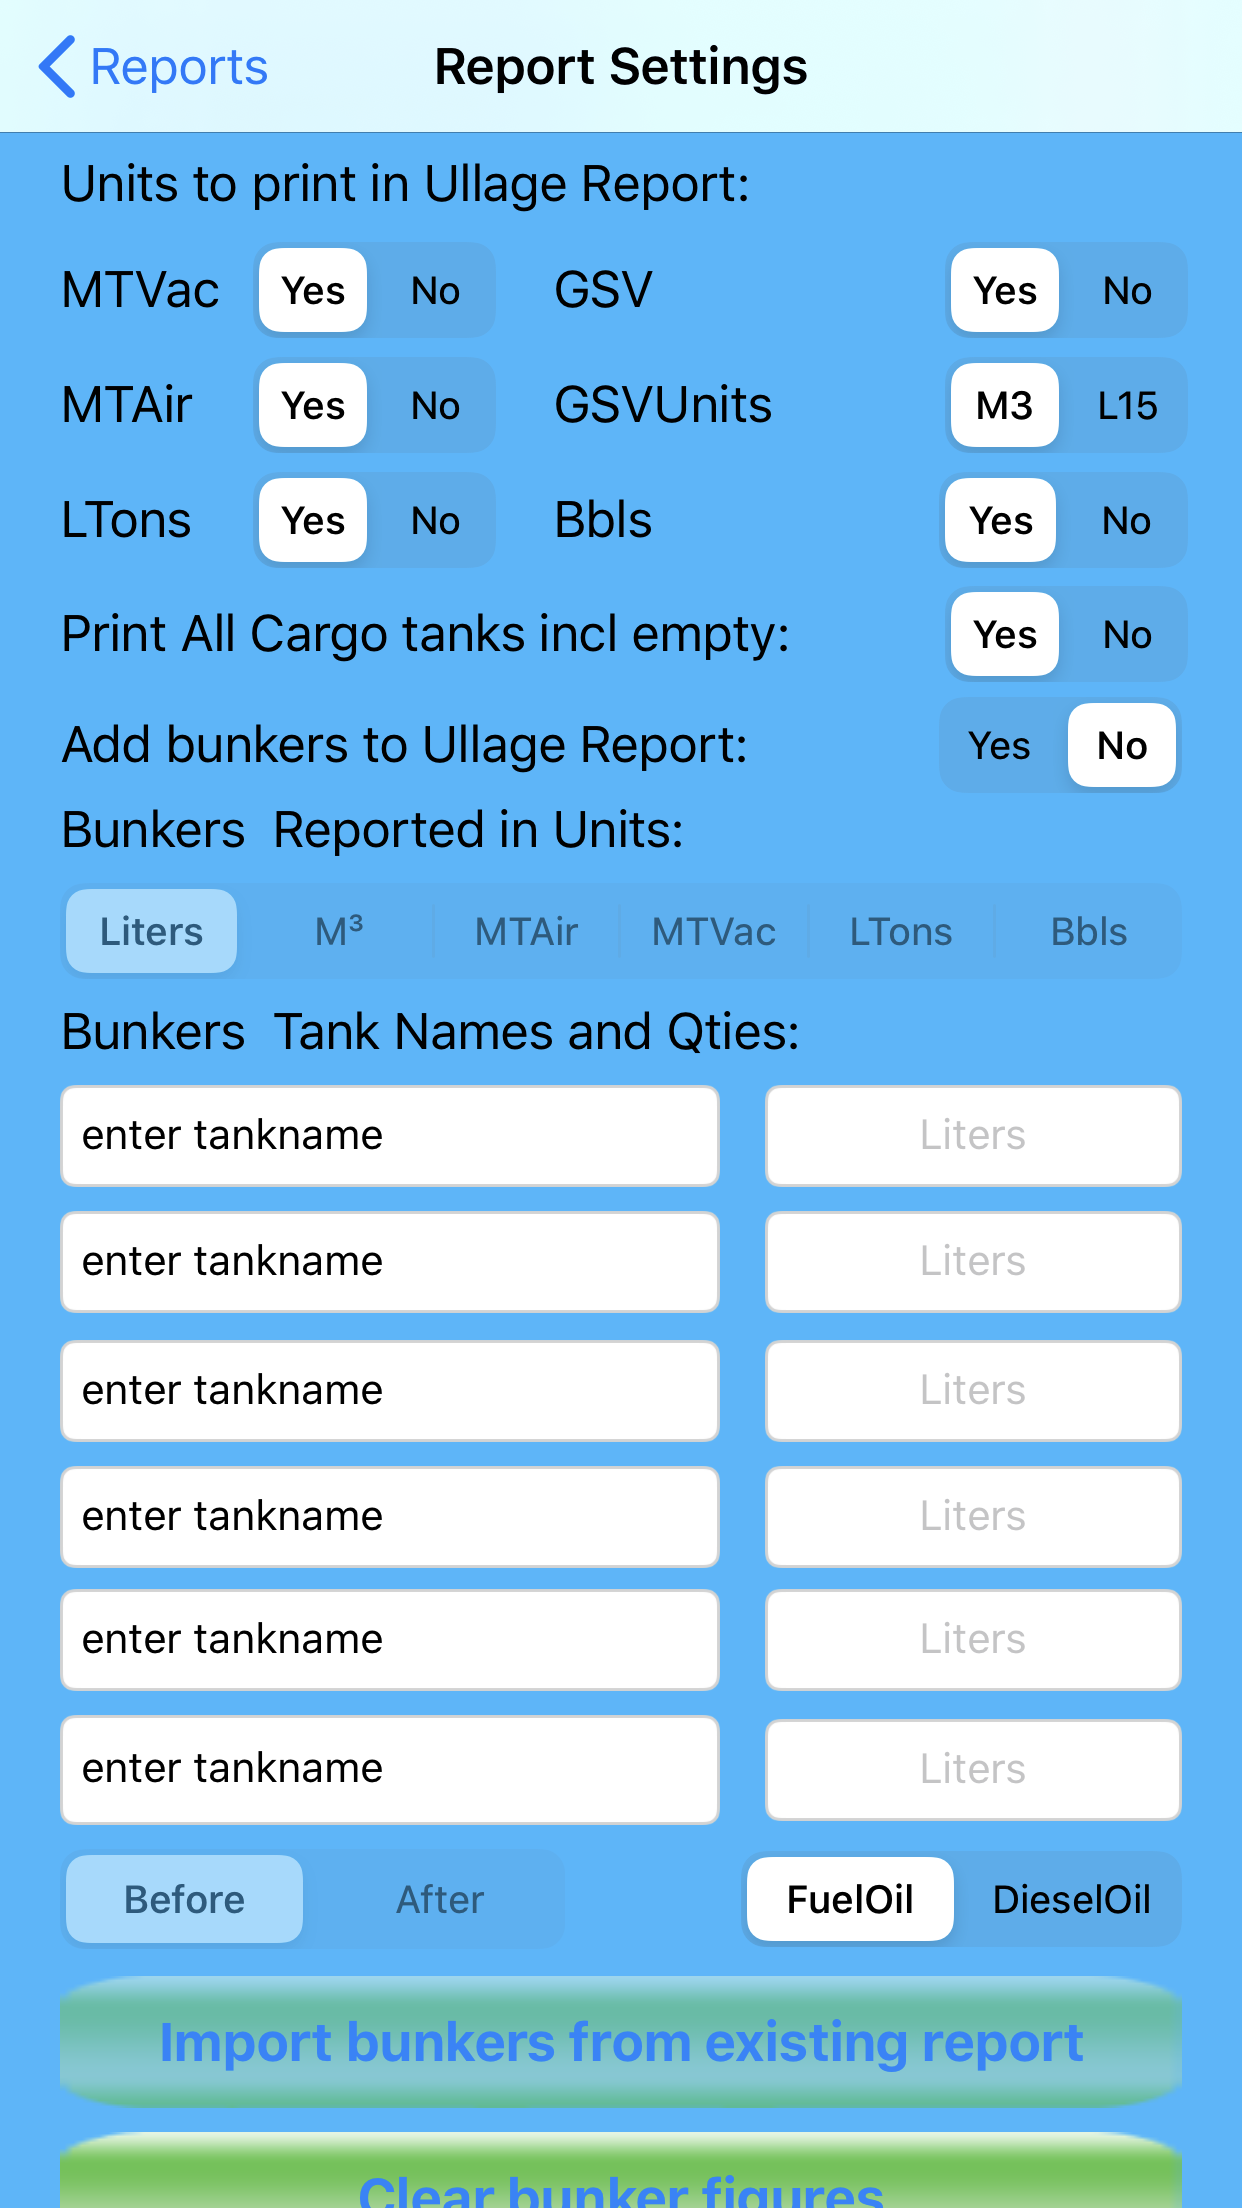
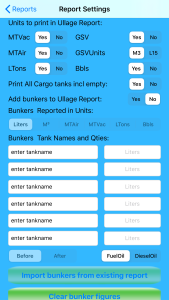
In the Report Settings screen, the following options have been added:
-
The option to print all tanks, empty or not, or only print tanks that have cargo
-
The option to include a bunker statement in the ullage report
-
The option to set the unit used for the bunker statement as Liters / M³ / MTAir / MTVac /LTons / Bbls
-
The option to print GSV in Liters or M³
-
The option to print or not, for all units individually: MTVac, MTAir, LTons, GSV, Bbls
-
When importing an existing bunker report, the option to either use Fuel or Diesel Oil data
As a reminder of the features of this app, the toolbox contains (among others) the following items:
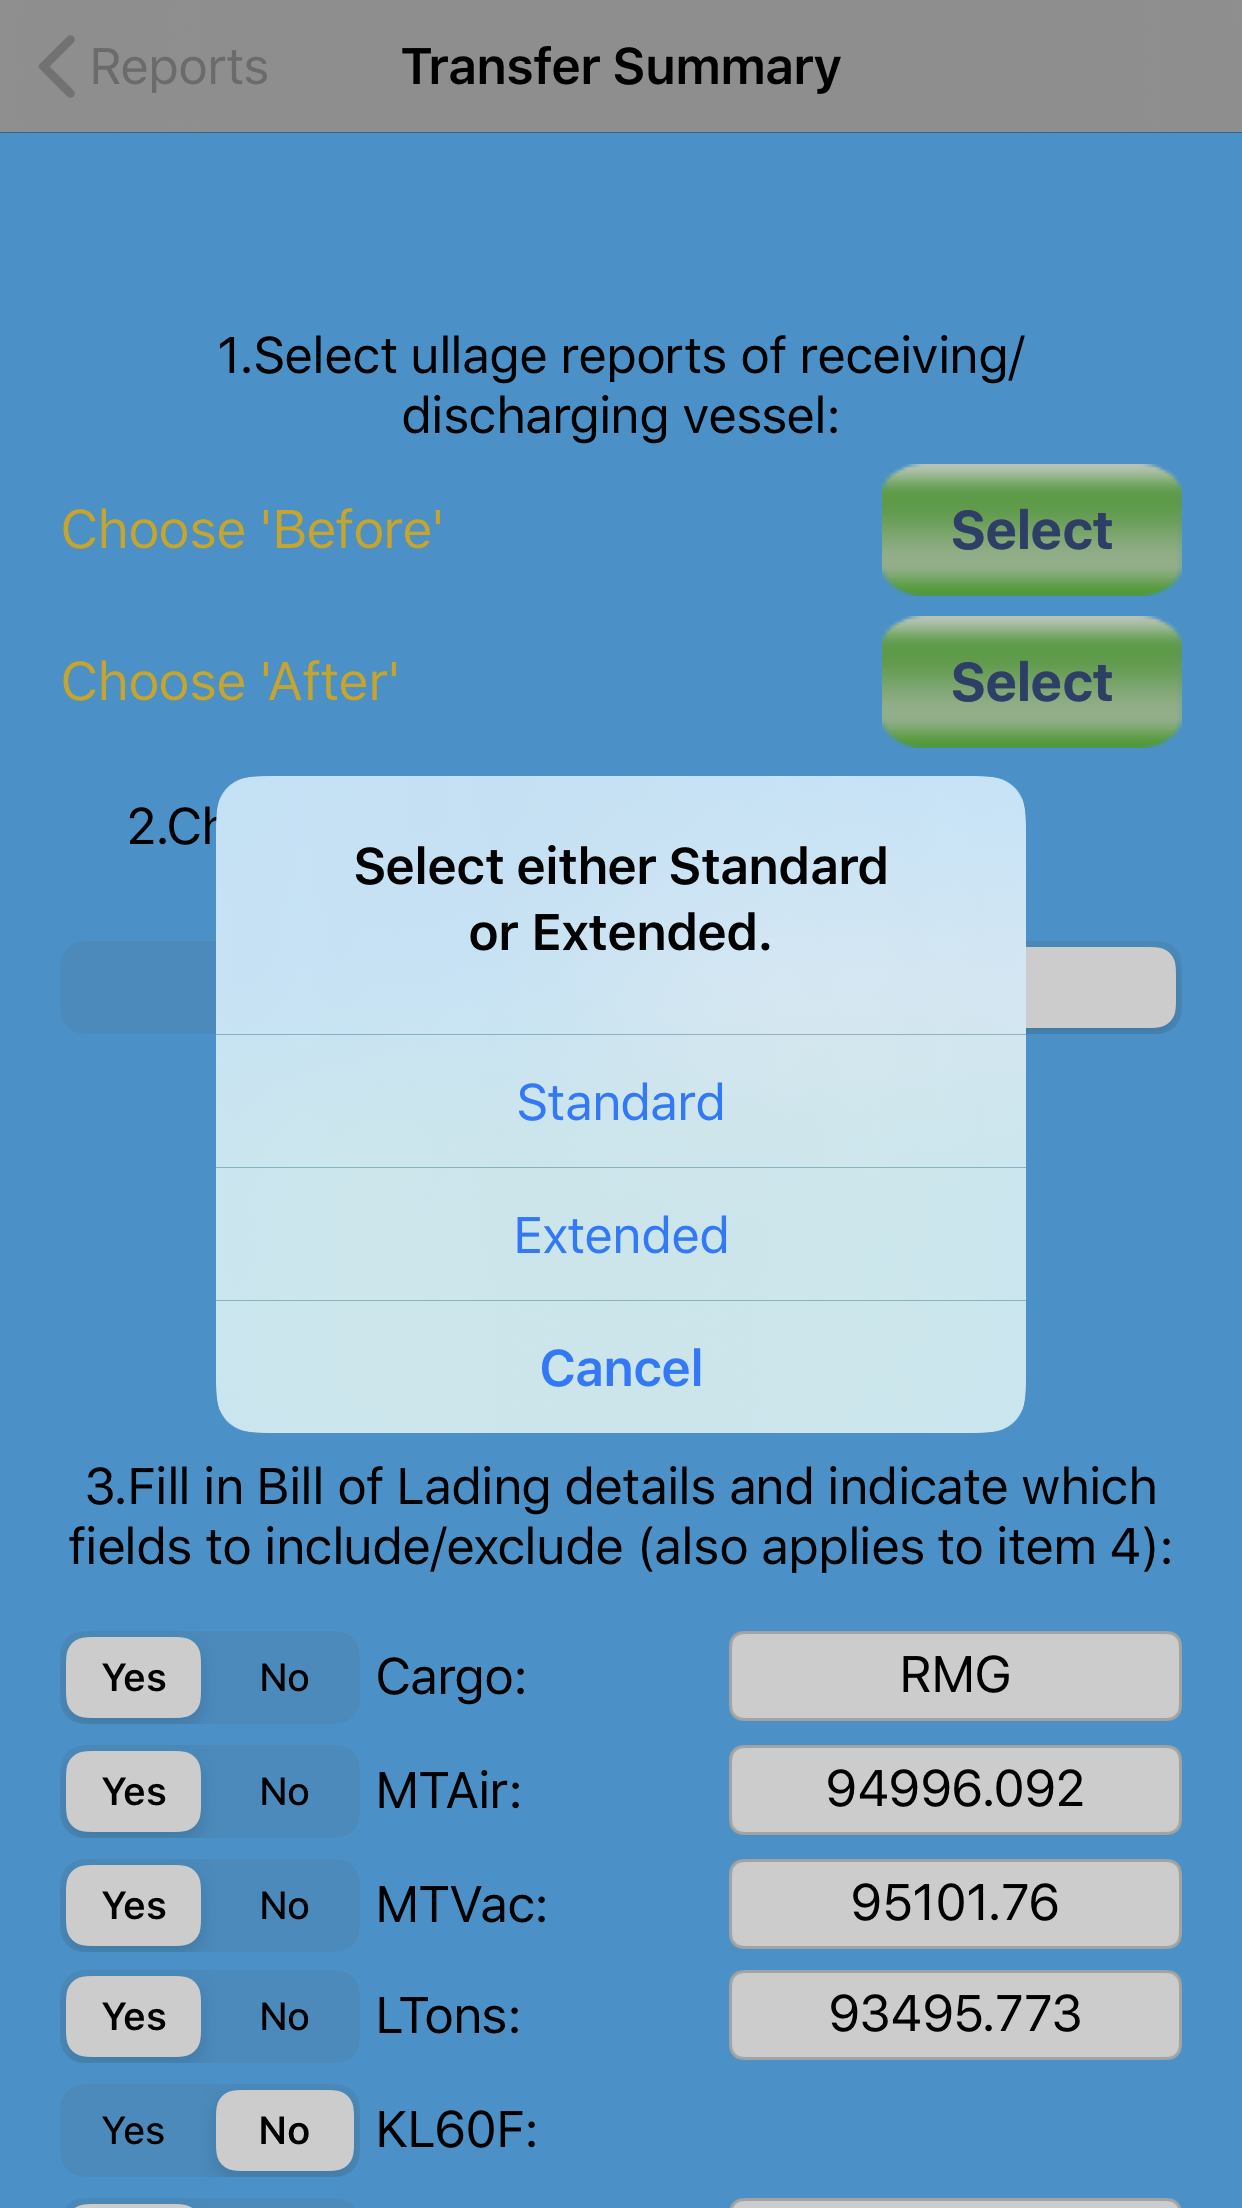
1: Fully configurable ullage forms:
In the new version, the first screen in the ‘Tanks’ tab gives the user a choice between ‘Standard’ and ‘Extended’ layout:
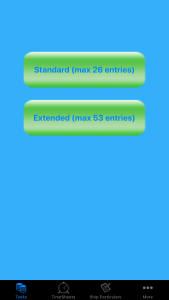
Main entry screen
When selecting ‘Standard’, the user can choose from a minimum set of 5 wing tanks plus two slop tanks, to a maximum set of 7 crosses plus two slop tanks, as well as three bottom lines, a total of 26 entries:
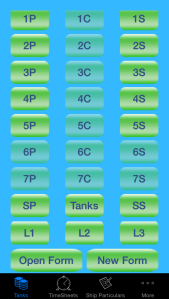
Configure number of tanks
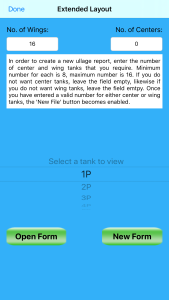
When selecting ‘Extended’, the user can choose from a minimum of 8 center tanks and a maximum set of 16 crosses plus two slop tanks, as well as three bottom lines, a total of 53 entries:
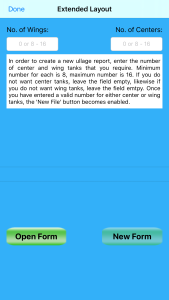
Extended Layout Configuration
Once a configuration has been selected (in the Standard configuration) or entered (in the Extended configuration), the tank editor screen is presented. The tank editor screen is the same for any configuration, regardless of whether standard or extended:
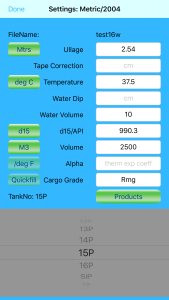
Tank editor using extended layout
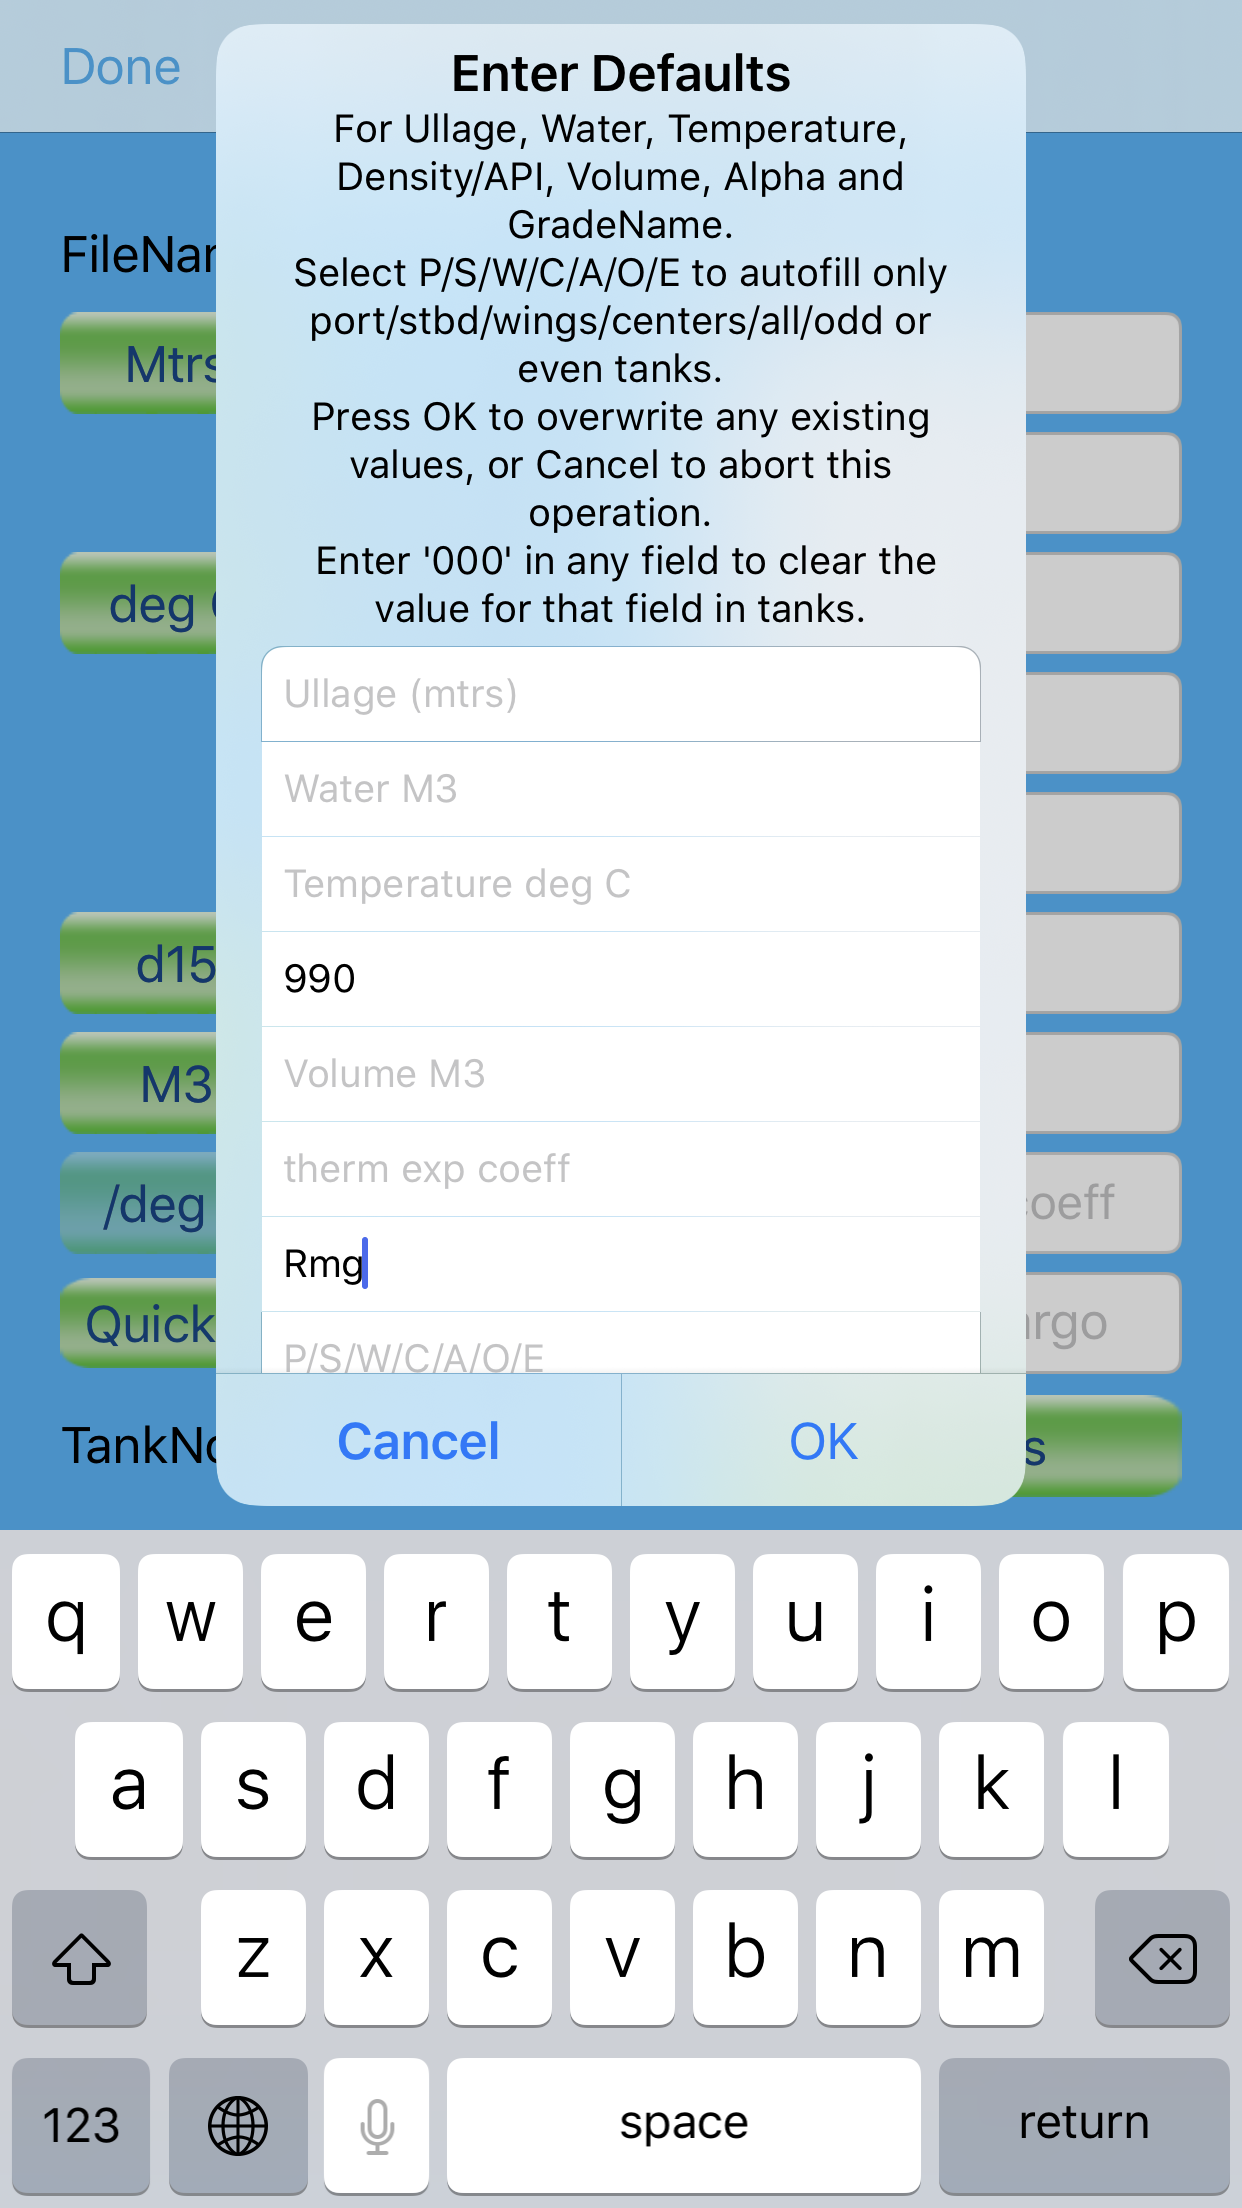
A new button has been added to the tank editor, ‘Quickfill’: this allows the user to fill in values for ullage / temperature / water / density / oil volume / alpha and grade name for all tanks or a group of tanks in one single action. This option is handy in case of for example loading a ship with one single grade, where grade name and density for all tanks are the same. The quick fill button is only enabled when the first tank is selected. The values entered can be applied to:
- all wing tanks
- all center tanks
- odd numbered tanks
- even numbered tanks
- all port side tanks
- all starboard side tanks
- all tanks
Quick fill option
Regardless of the program’s main settings, ullages /temperatures/densities/volumes can be entered in either SI Metric or Imperial units. In the same report both Metric and Imperial units can be mixed, the app will automatically convert to the right units during processing.
When the time comes to save/print or email the report, the user can choose whether to use SI Metric or Imperial units, regardless of which units have been used during the creation of the report. An unlimited number of ullage reports can be saved, and existing reports can be cloned in order to create different reports for the same ship (i.e before and after discharging etc).
The report in pdf format can be send as an email attachment from within the app, and can also be saved automatically as a png file to the camera roll. If required, both the png file and the pdf file can then be transferred to a desktop computer for printing.
In the Report Settings the user can choose whether reports should automatically be saved to the camera roll or not. For Ullage Reports, Bunker Reports, VEF Reports and Time Sheets the report can be exported to a csv (Comma Separated Value) file, which can also be sent as an email attachment from within the app.
2: Fully configurable time sheet editor:
The time sheet editor comes with a whole bunch of standard entries but has ample room for new entries as required by the user. Events can be entered into the editor in any order, the app will automatically sort all entries by date and time. An unlimited number of time sheets can be saved, one for each ship and/or event as desired. Like the ullage report, the time sheet can be send as an email attachment from within the app, and can be saved to the camera roll for transferring to a computer:
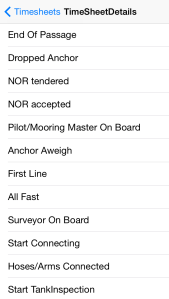
Time sheet standard entries

Time sheet details editor
3: Configurable wedge calculator:
The app contains a wedge calculator with the following features:
– calculate wedge volume based on ship/tank dimensions
– calculate wedge volume based on tank calibration table volume
– calculate wedge volume using either Metric or Imperial units
Entries made are automatically saved and restored the next time the user opens the wedge calculator.

Wedge volume using tank dimensions

Wedge volume using tank table volume
4: Instant tank totals view per grade, or for all grades together:
After creating an ullage sheet and filling in a grade name, temperature, volume and density (or API) for each tank, the user can view the tank totals, either per grade or the grand totals. The totals screen will give the totals of observed volume, gross standard volume, metric tons etc, as well as the physical average temperature of the cargo.
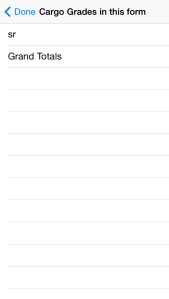
List of available grades
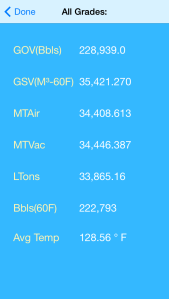
Totals – Imperial units
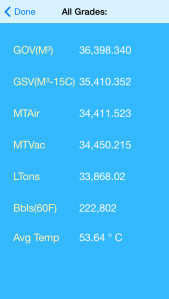
Totals – Metric units
Again regardless of what units have been used in the ullage report, the totals can be viewed in either Metric or Imperial units by choosing the desired unit in general settings.
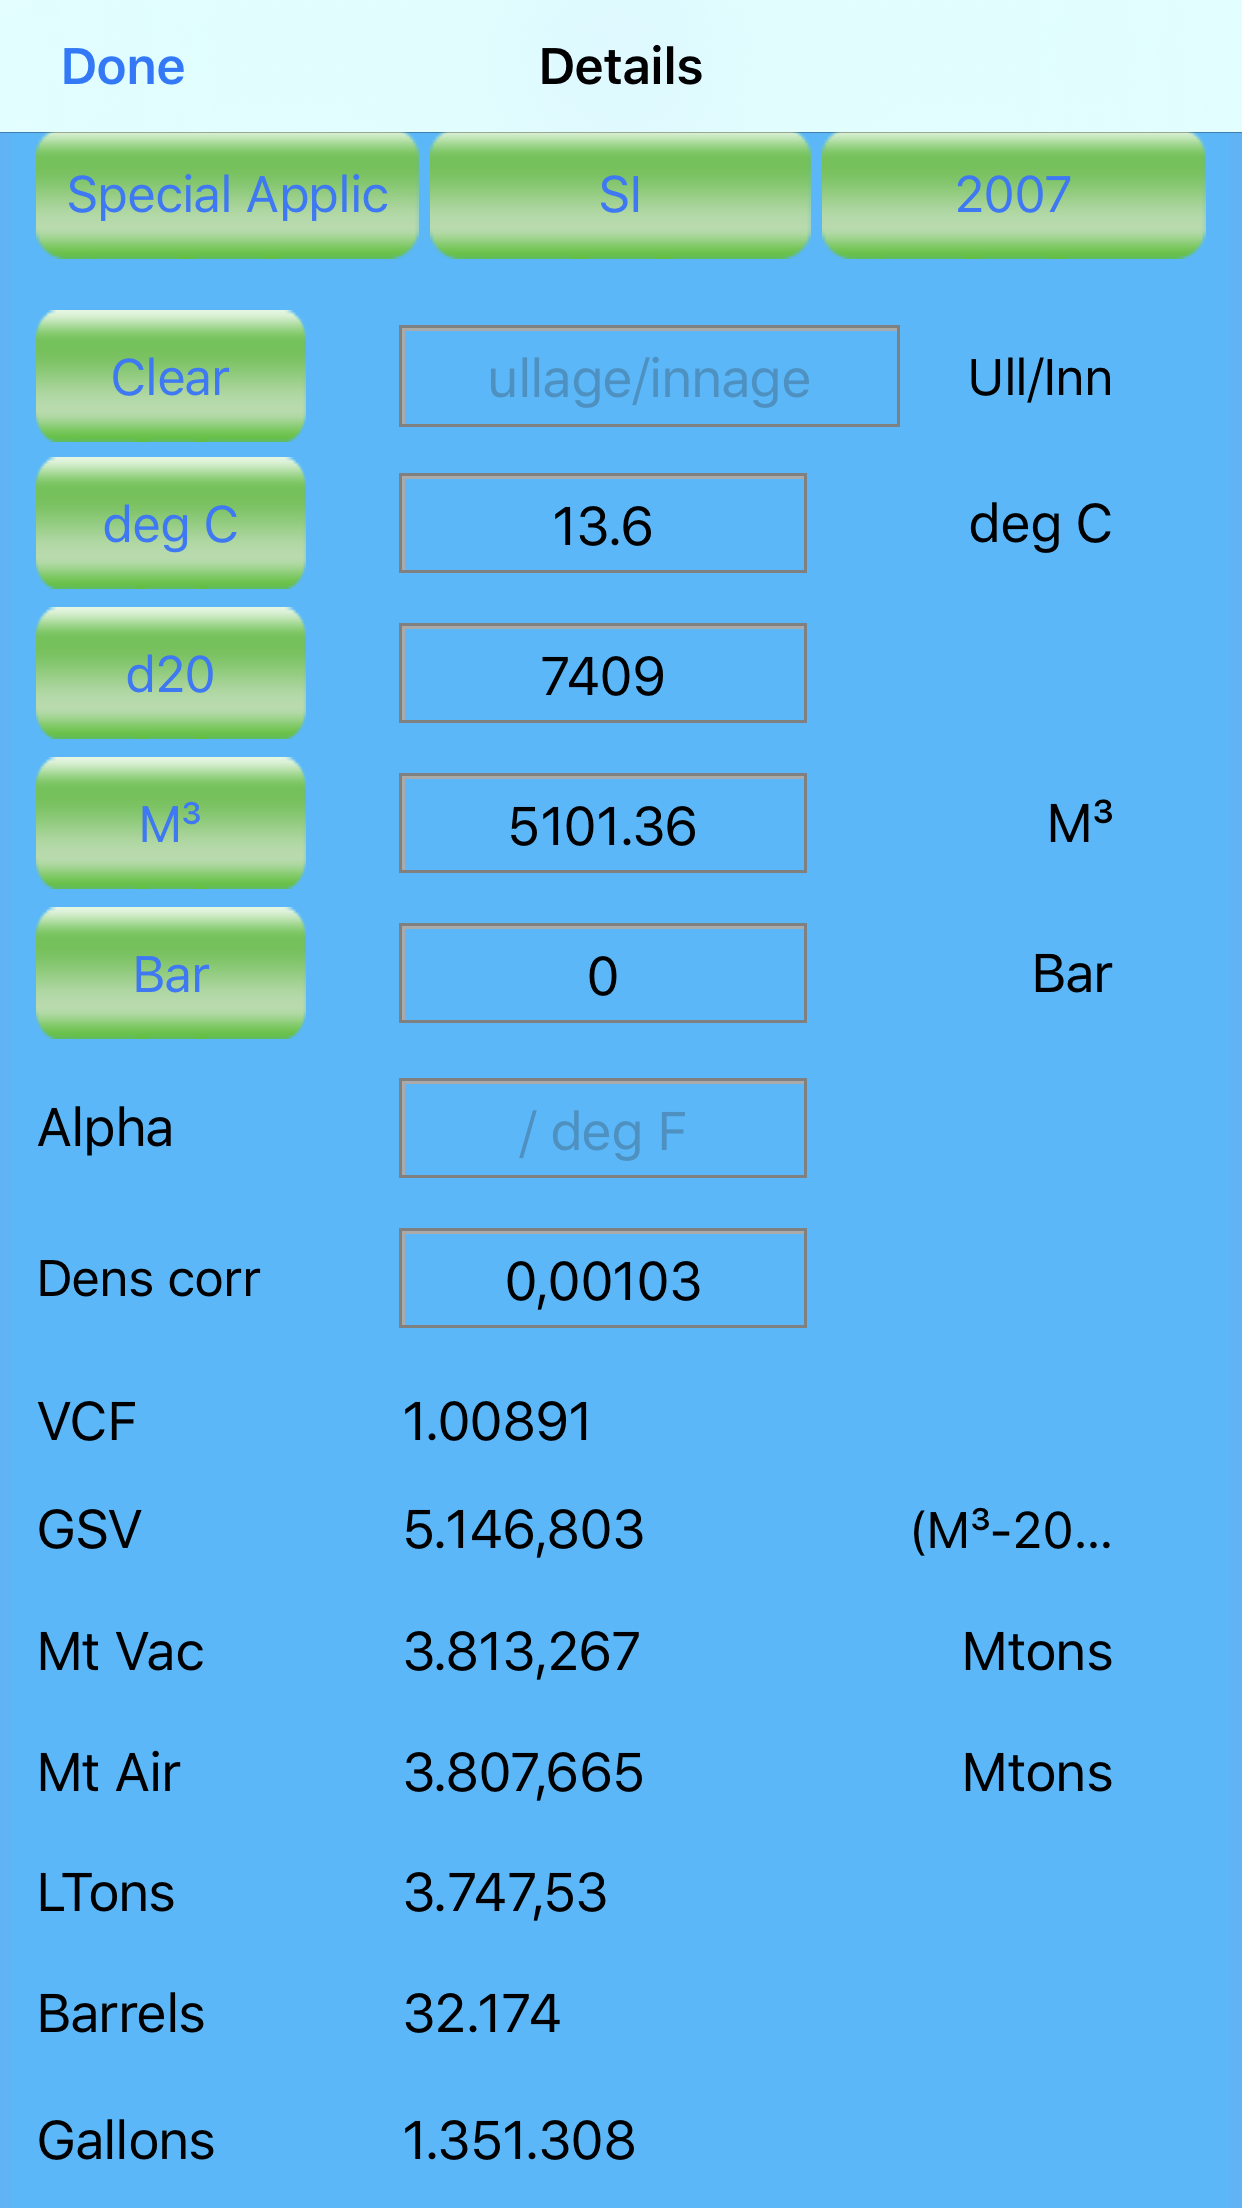
5: Detail view for each tank after entering data:
After entering data in the tank details editor, all data can be viewed for each tank in the Layout configurator screen, using the buttons to select either a tank or a bottom line (in the standard layout configurator), or select a tank using the picker view (in the extended layout configurator):
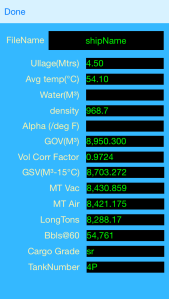
Details of tank 4P
Select tank using buttons
Select tank using picker
6: Ullage reports are now much more configurable:
With Report Settings, the user can select whether to print or not:
- MTVac
- MTAir
- LTons
- GSV
- Bbls/Gallons
Also, empty tanks can either be included in the report, or omitted. The GSV can be printed as either Liters at 15°C/60°F or M³. Also, if in General Settings ‘Apply VCF to totals only’ is set to Yes, GSV is only printed for totals, not for individual tanks.
Additionally, bunker quantities before and after the cargo operation can be added to the ullage report by setting ‘Add bunkers to Ullage Report’ has been set to Yes in Report Settings. These bunker quantities can either be entered manually, or imported from an existing bunker report.
The user can set the bunker quantity units to either Liters / M³ / MTAir / MTVac / LTons / Bbls.
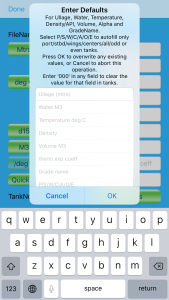
Settings: in the ‘more’ screen the user has access to a settings panel, where there are options to:
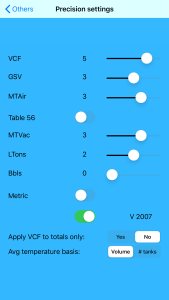
New options in General Settings
– chose ASTM tables 1980 or 2004
– chose SI Metric or Imperial units and methods (i.e. whether to use table 6A or 54A for example)
– chose whether to calculate metric tons in air using table 56 or using density(vac) – 11 points
– set the precision for vcf, gsv, metric tons etc
– Apply VCF to totals only using the average cargo temperature
– Calculate the average temperature (for all tanks or for a grade) basis the total cargo volume, or basis the number of tanks
Aside from the above, the app contains a complete set of forms as required by marine cargo surveyors:
– Customizable report settings, including company logo, standard email recipients, report titles etc
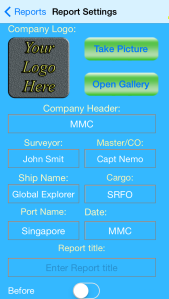
Report settings top part

Report settings (center part)
Report Settings bottom part
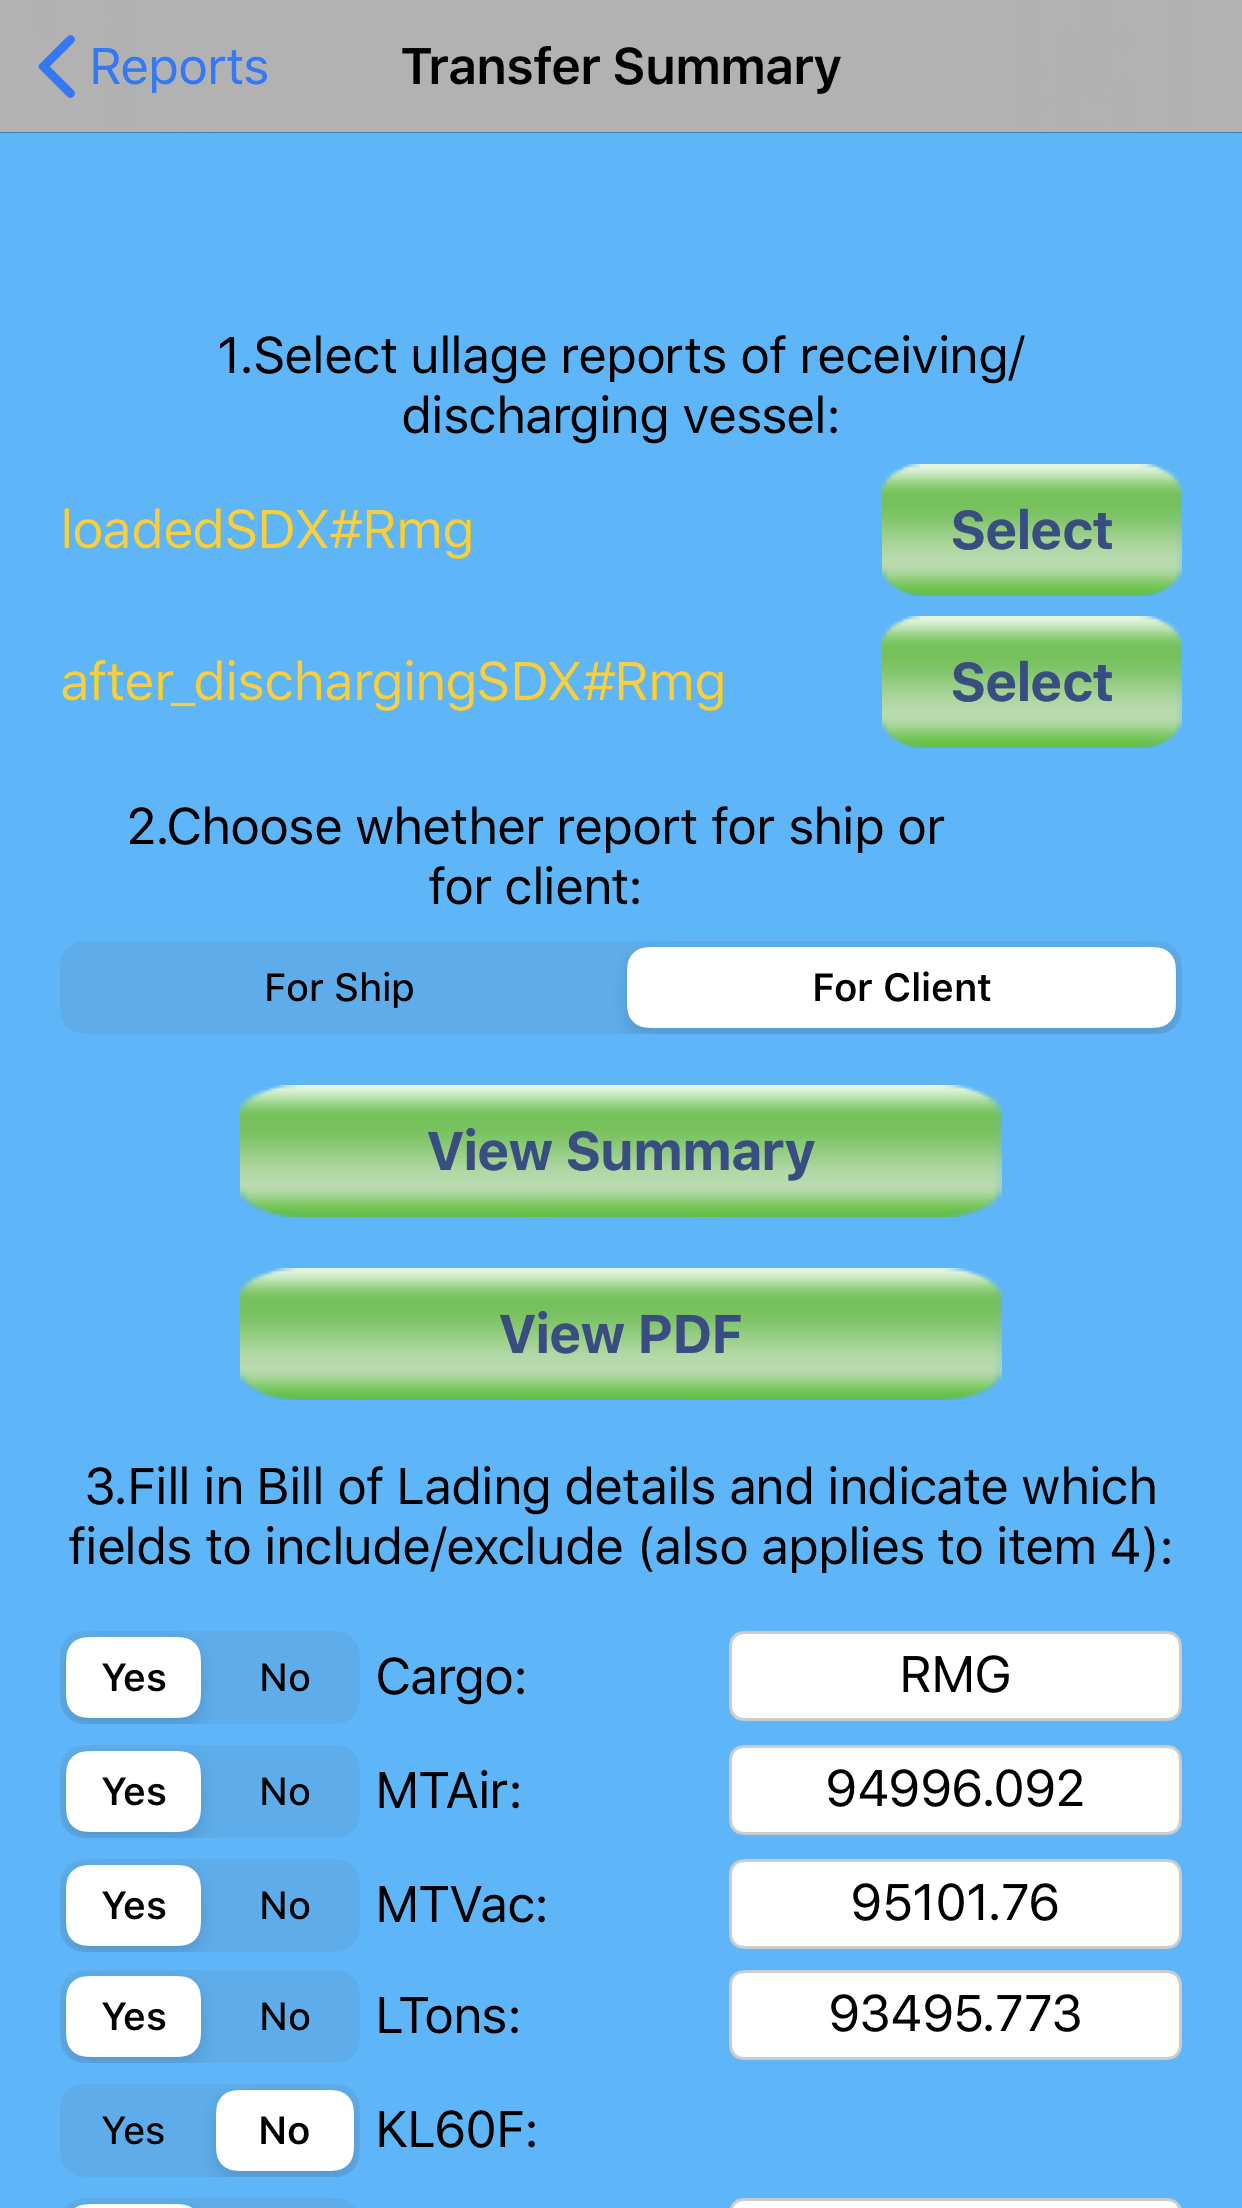
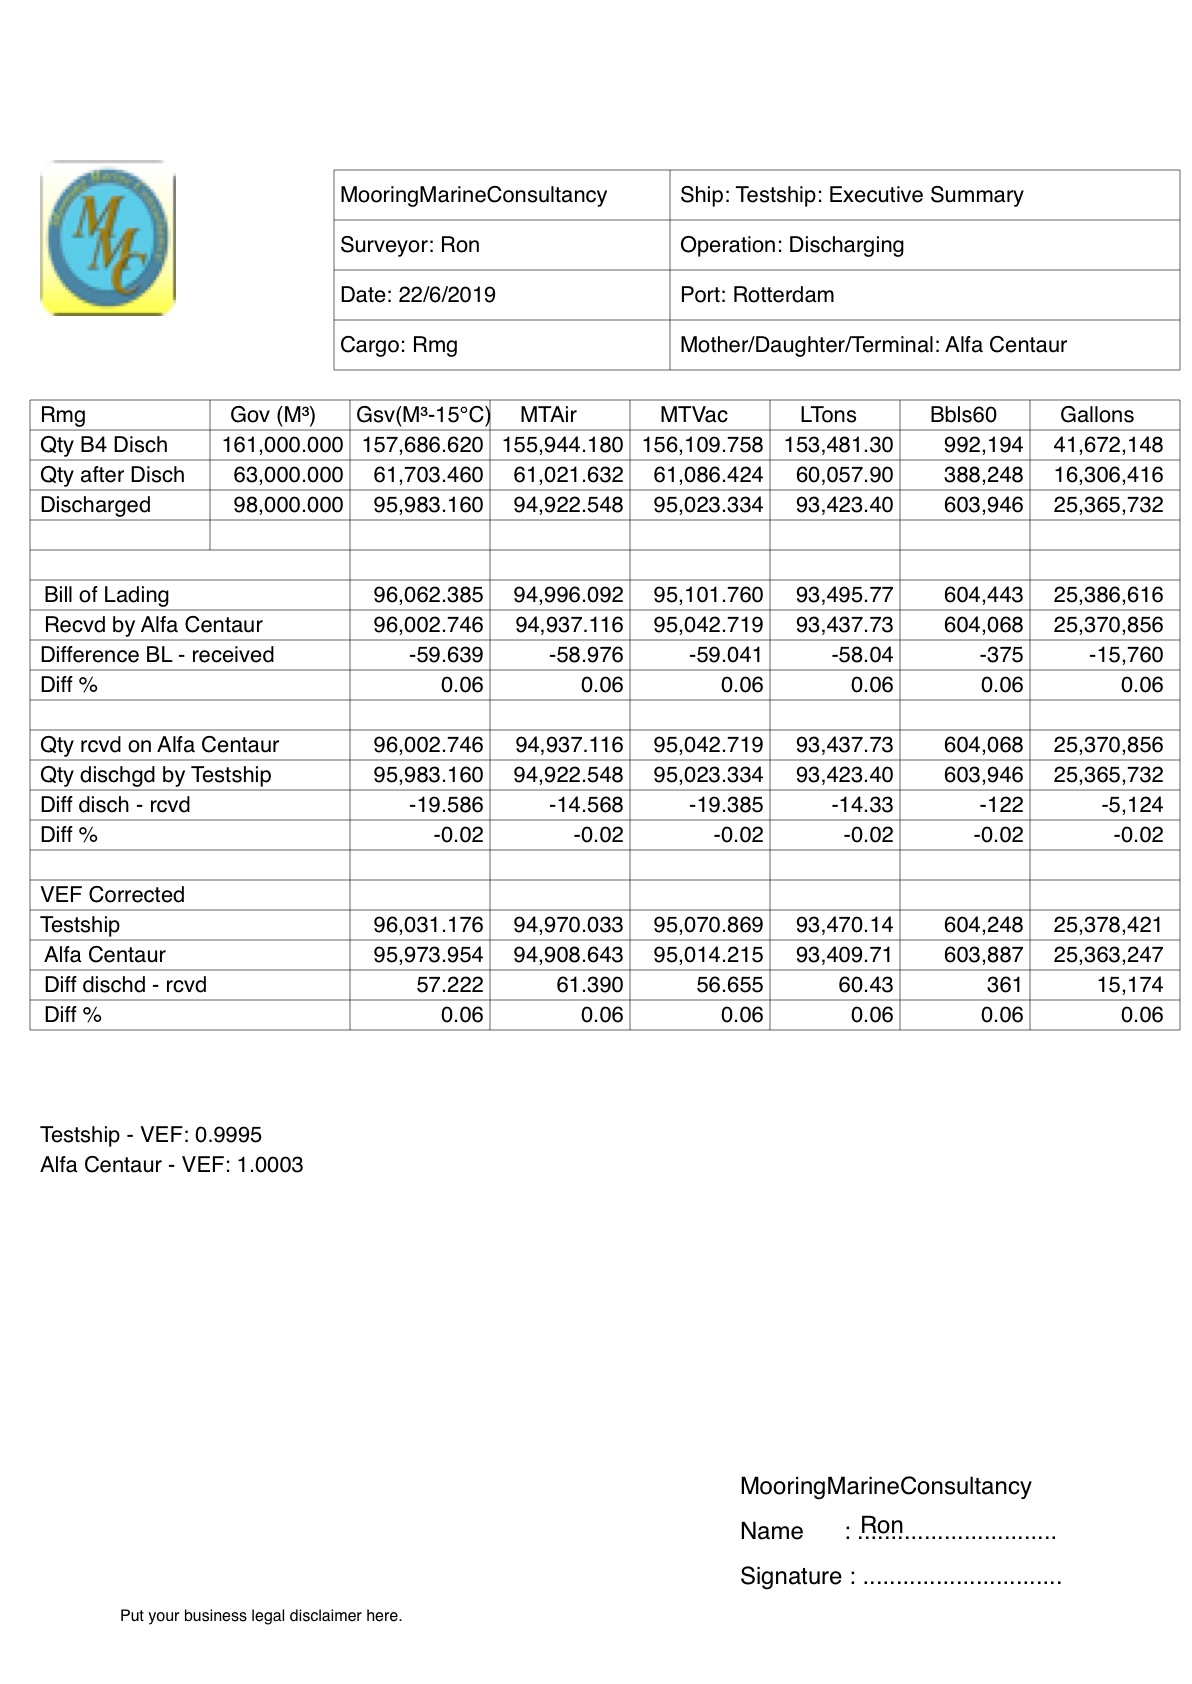
– Transfer summary (for vessel) and executive transfer summary (for the client)


New entries have been added to the transfer summary:
– VEF for own ship in case of STS
– VEF for daughter vessel in case of STS
– Bill of Lading date in case of loading operation
In case of STS operations, a VEF corrected comparison is now also included with the executive summary.
All other reports remain as they were, but one more addition is the ability to export and import the following reports as csv (comma separated value) files:
– Ullage report
– Bunker report
– VEF report
– Time Sheet
These reports can be viewed or imported into Excel. Exported reports are copied into the phone’s documents folder, and during exporting, the user gets the option to email the exported file as well.
We’re going to publish several articles with more detail concerning the new features in CargoSurveyor in the coming days, so keep watching this space!
 CargoSurveyor for iPhone can be downloaded here.
We should like to advise everyone who has downloaded the app in the past to update as soon as possible to ensure a flawless CargoSurveyor experience.